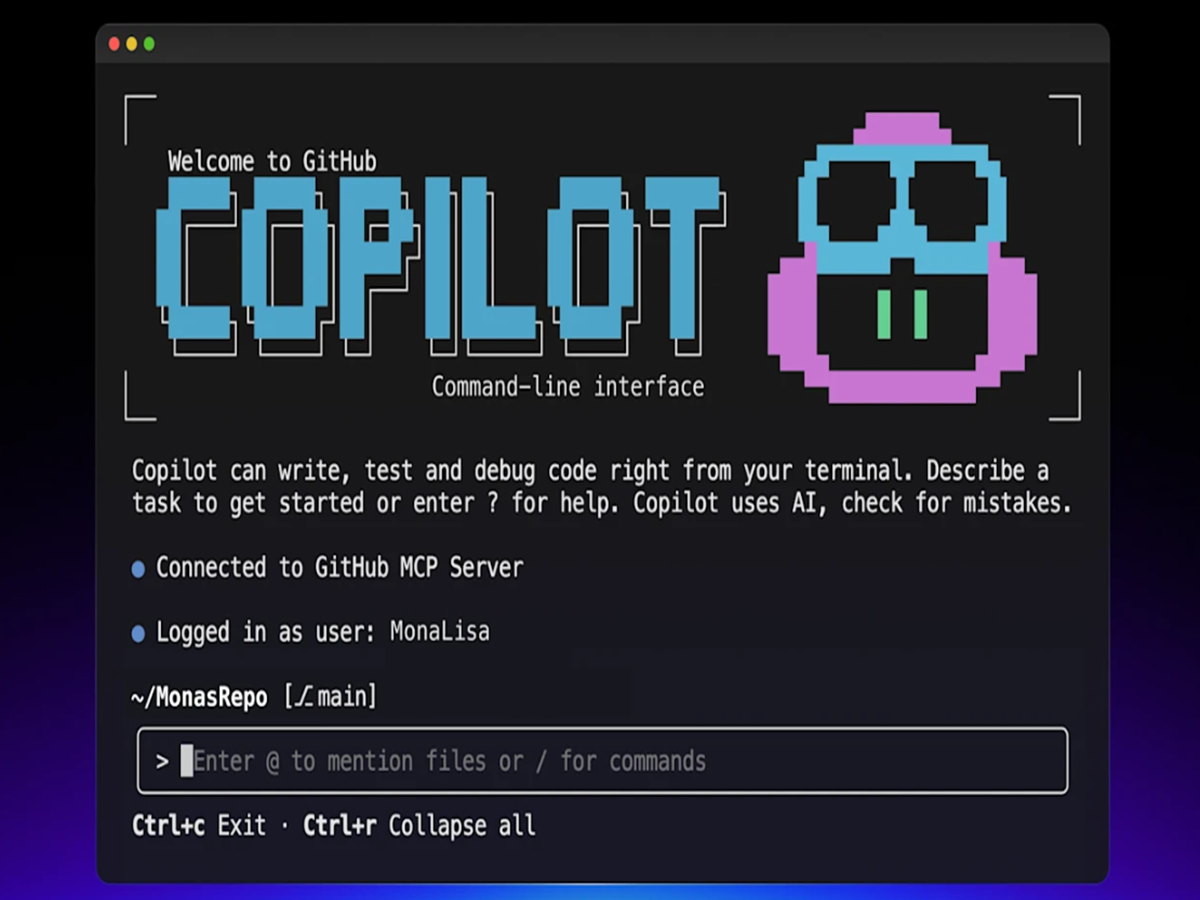
Page 1: Your Terminal’s New Sidekick: Unlocking the Power of GitHub Copilot CLI
For too long, the command line, while powerful, has remained a domain of manual commands, memorized flags, and often, extensive context switching. Today, we’re diving deep into a game-changer: GitHub Copilot CLI. This isn’t just another plugin; it’s an intelligent agent embedded directly into your terminal, designed to read, write, and run code where you work, fundamentally transforming your development workflow.
What is GitHub Copilot CLI?
At its core, GitHub Copilot CLI is your AI-powered companion in the terminal. Leveraging the advanced capabilities of large language models, it understands your intent, helps you navigate codebases, automates tedious tasks, and even assists with debugging – all through natural language prompts. Think of it as having an expert pair-programmer constantly at your side, but within the familiar confines of your command line interface.
It’s currently in public preview (as of February 2026) and available to all developers with an active GitHub Copilot paid subscription (Individual, Business, or Enterprise plans). This means if you’re already enjoying the benefits of Copilot in your IDE, you can extend that intelligence directly to your terminal without any additional cost.
Getting Started
Click this link: Get Started with GitHub Copilot CLI to go to GitHub documentation on installing and logging in to GitHub Copilot CLI.
Modes of Use
GitHub Copilot CLI is designed to be flexible, fitting into your workflow whether you need a quick answer or a deep dive into a complex project. You can interact with it in two distinct ways, Programmatic or Interactive:
1. Programmatic
This mode is useful when you want to send GitHub Copilot a prompt directly from the terminal without going into Interactive Mode.
- Best for: Automation, CI/CD pipelines, or quick one-off tasks like summarizing commits.
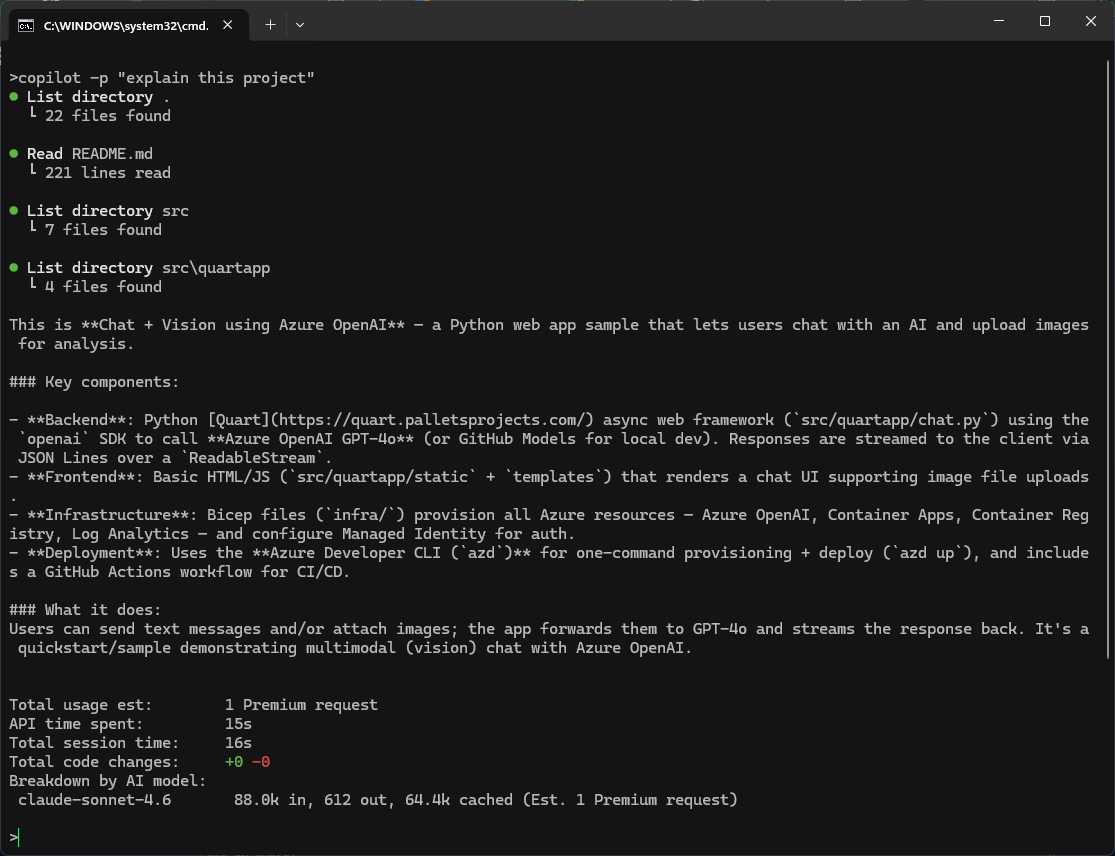
For example, if you want to understand what type of project you have in your directory you could simply write the command below to get back a detailed explanation of the project without leaving the terminal.
copilot -p "explain this project"
You can also execute shell commands to get information back about your project. For example, the command below will return information about the 4 previous commits. I pass in the argument “–allow-all-tools” so it can use Git without asking for permission.
copilot -p "list last 4 commits with messages" --allow-all-tools
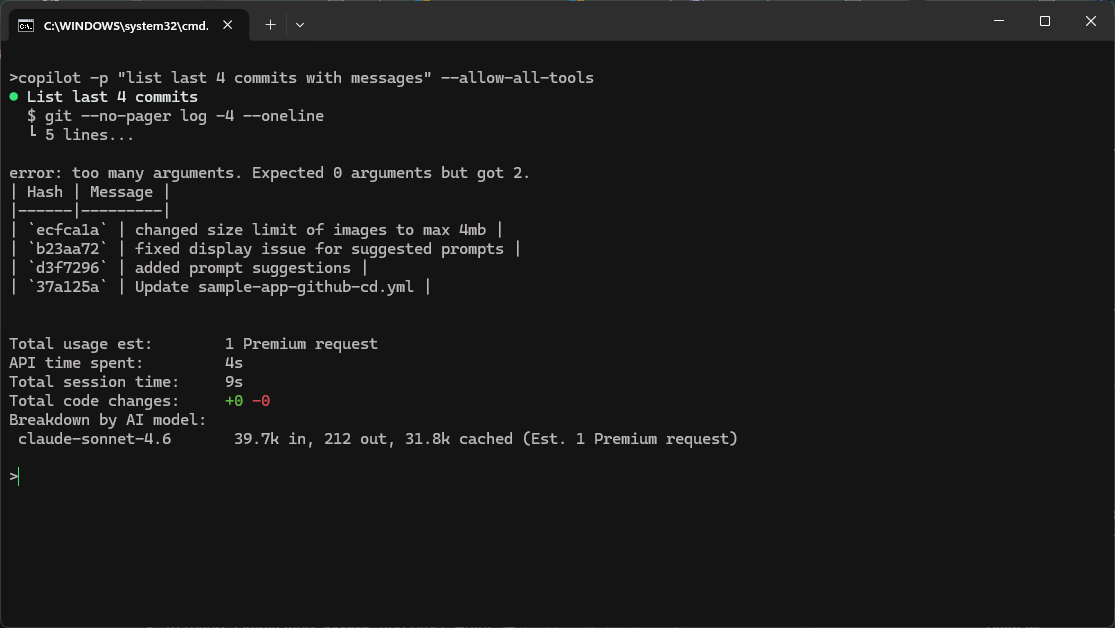
When using programmatic mode with automatic approval flags (like --allow-all-tools), Copilot can execute shell commands and modify files without asking for permission.
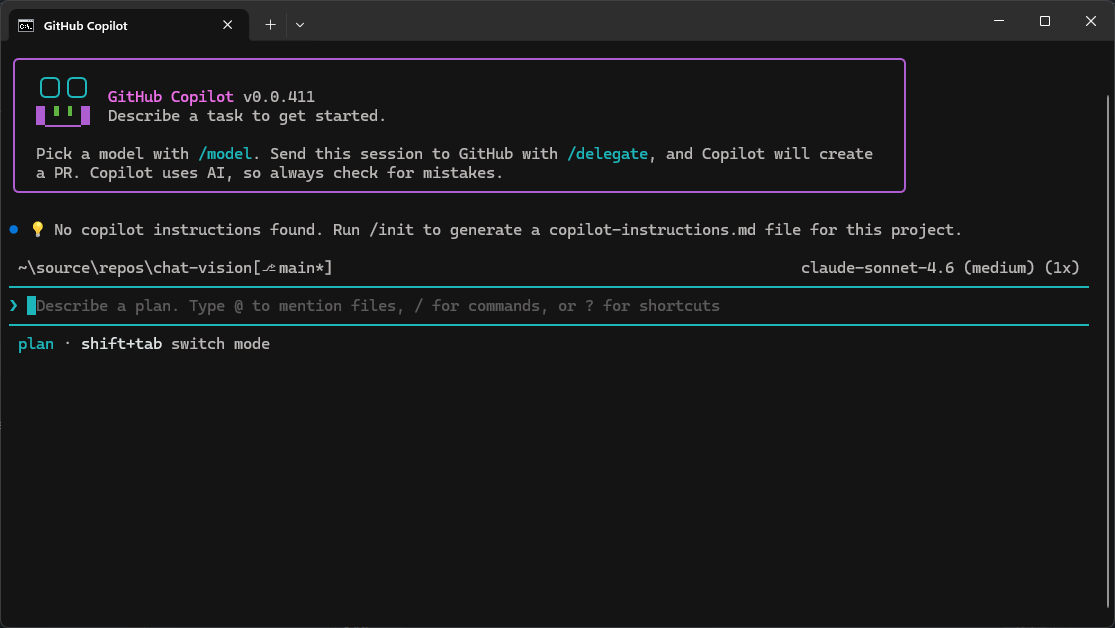
2. Interactive
Interactive mode is the default way to work with the CLI. To use Interactive Mode, navigate to your project’s directory in the terminal, then simply type the copilot command and you enter a persistent session where you can chat with the AI just like you would in a web interface, but with the added context of your local environment.
- Best for: Asking questions, debugging errors in real-time, or iterating on a piece of code through back-and-forth conversation.
- Key Feature: You can react to Copilot’s suggestions and refine them within the same session.
When in Interactive Mode, you can choose between “Plan” or “Autopilot” by pressing Shift + Tab to cycle between them.
Plan Mode
In Plan Mode, Copilot analyzes your request and asks questions to better understand the scope and your requirements. It builds a plan before writing any code which will help you catch any misunderstandings before any code is written. In Plan mode, you stay in control during complex and multi-step coding tasks.
- Best for: Multi-step implementations or architectural changes where you want to verify the logic first.
- How it works: Copilot analyzes your request, asks clarifying questions to ensure it understands the scope, and builds a structured implementation plan for you to review.
Autopilot Mode
In Autopilot Mode, you can give Copilot the permission to let it do the work without requiring approval, unless you want it to get approval first.
Let’s add authentication to an app using Plan Mode
In the terminal, navigate to your project’s directory and type copilot, you will then be asked if you trust the files. Then press Shift + Tab and select Plan.
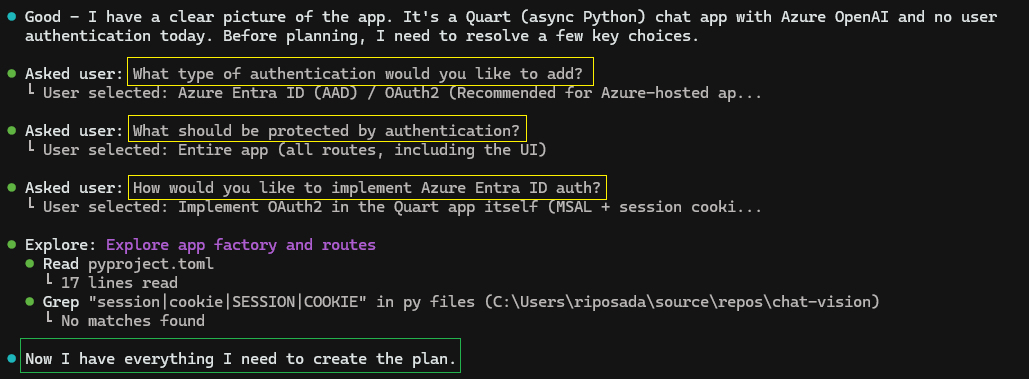
Clarifying Questions
Copilot will begin to examine the entire project and will ask clarifying questions so it can create an accurate plan. It asked:
Plan of Action
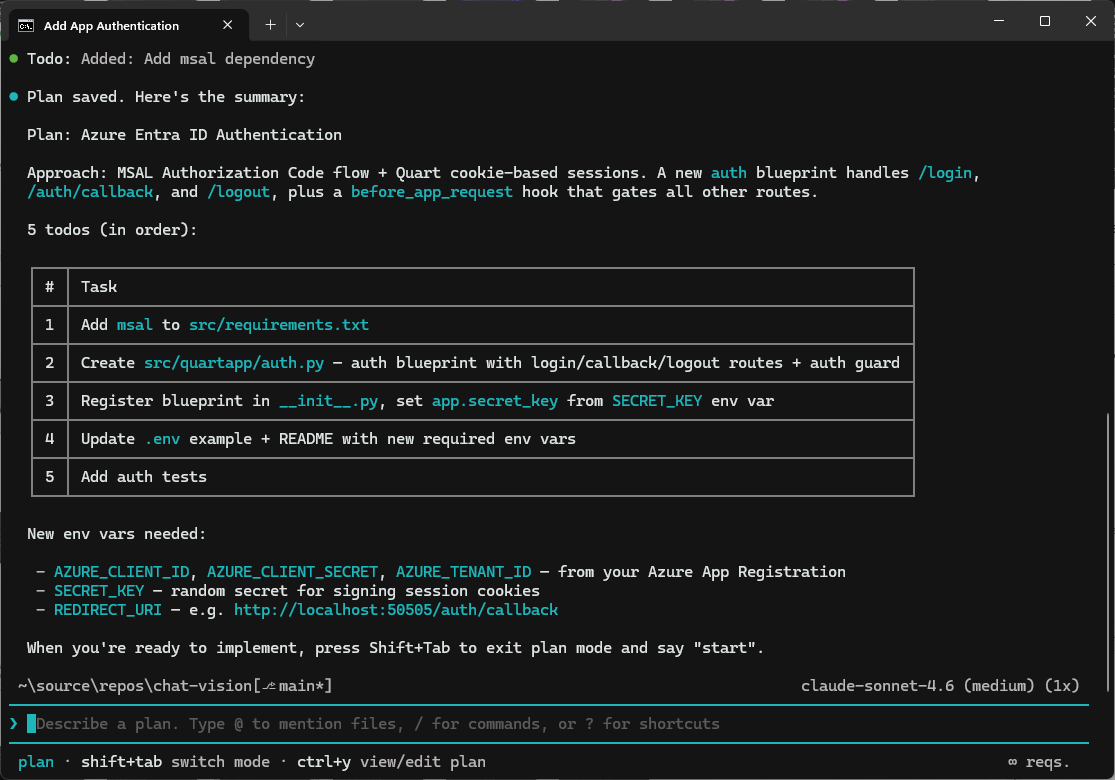
The goal of Plan Mode is not to make code changes, rather it is to create a plan of action so that you can validate that it correctly meets your requirements before any code is modified. Here’s the plan it created to implement authentication:After Copilot had obtained all the information it needed, it was then able to create a plan. It provided an ordered list of what I need to do to implement authentication and then it asked
Plan Looks Good, So Let Copilot Write Code
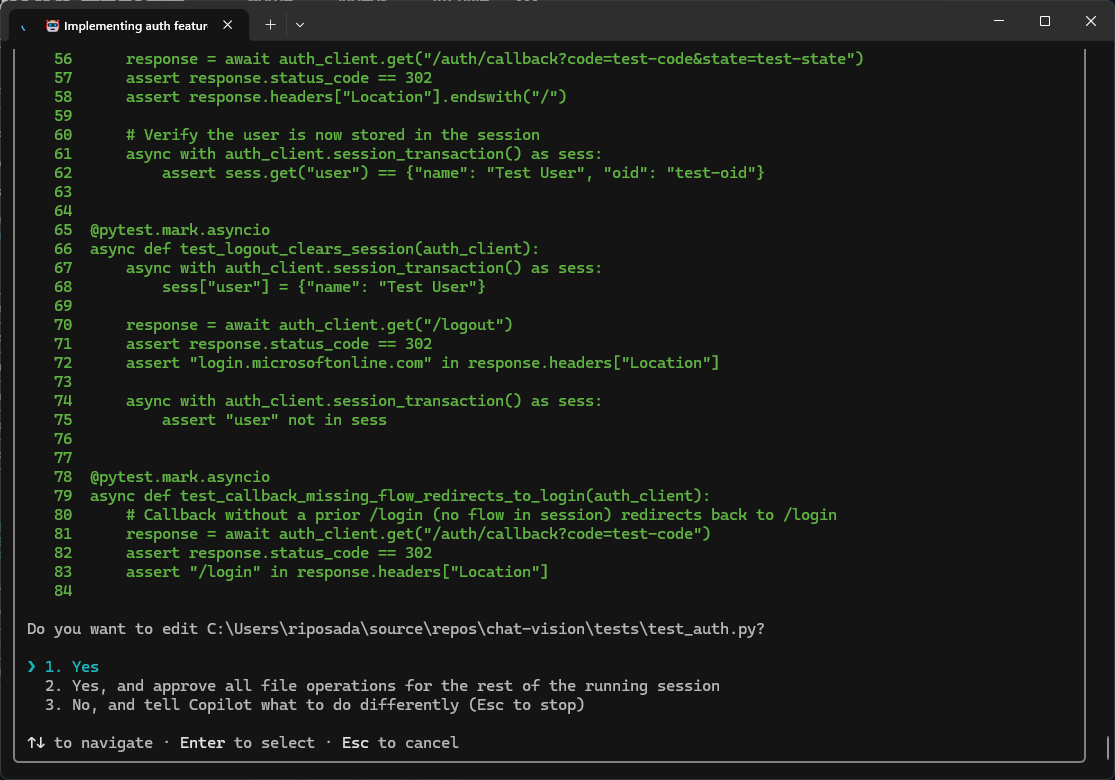
To make code changes, we need to switch out of Plan mode by pressing Shift + Tab and type Start. At this point, Copilot will begin implementing code changes by following the plan that it just created. It will ask for permission before modifying any file, or you could do this in yolo mode at not have it ask for permission. Here’s one of the files it modified. The text in green is new code written by Copilot.
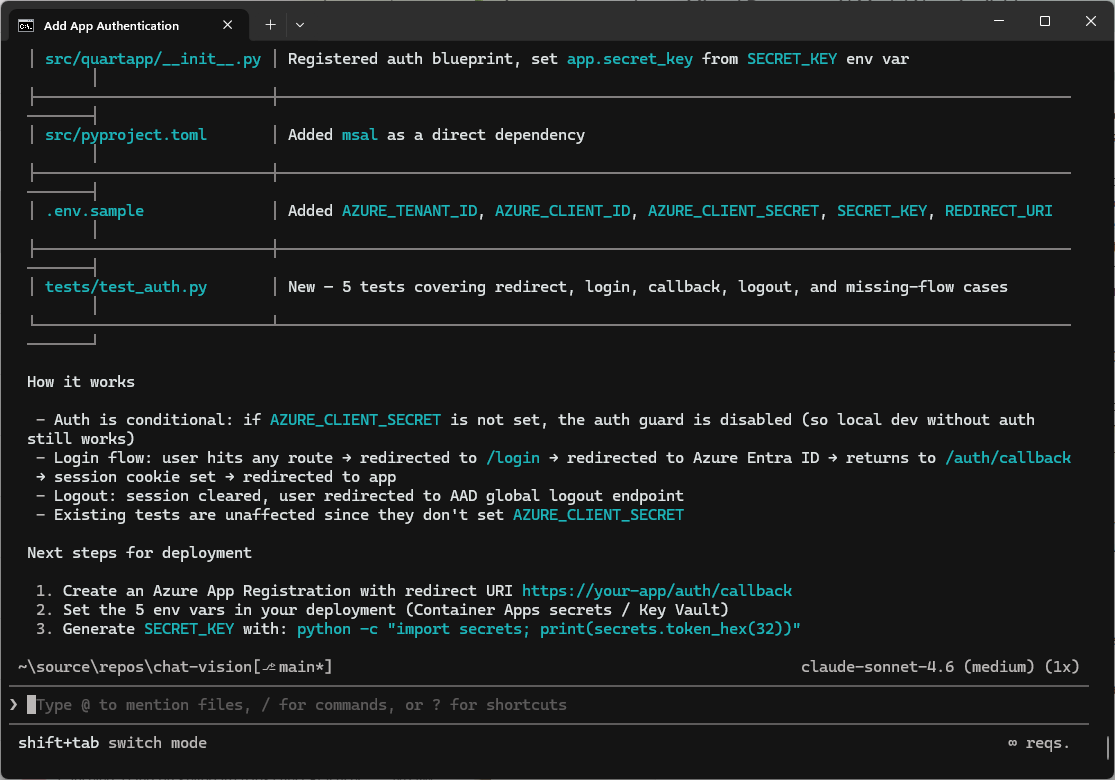
Changes Made
At the end of the process, the CLI provided a list of all the changes it made with a explanation of the change.

Session Complete: Authentication Added
It also finished the session with the next steps needed for deployment.
Real Productivity Gains
Copilot didn’t just autocomplete a few lines, it reasoned through the problem, modified multiple parts of the codebase, installed the right dependencies, and validated the work with tests, all in a fraction of the time it would normally take. What might have consumed a full day or two of focused engineering effort was compressed into about 20 minutes of guided iteration. That’s the real power of GitHub Copilot. It doesn’t replace the developer, but it dramatically accelerates the path from idea to implementation, letting you focus less on mechanics and more on architecture, design, and impact. And now with the GitHub Copilot CLI, we can work in the terminal without having to open up and IDE.
